Pages

Sep 27, 2011

Transforming a Dresser Project


About 4 years ago we moved house.

We moved from a nice, homely, small apartment to a nice, homely, small house. The only major difference was now the stairs, at least, were inside the home.

We didn't have much stuff and everything went in one van. With a couple of friends helping out we were all done and dusted in an hour or two.

Except for one thing. The dresser. Which would not fit up the stairs.

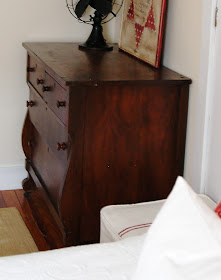
A few years earlier we had bought this huge dresser. 5 big drawers for her, 5 big drawers for me. And now it stood slap bang in the centre of our 'parlour sized' living room like a big sore thumb. That's if your idea of a big sore thumb was 5ft x 4ft x 2ft and made of solid wood.

There were late night discussions. "Do we take a window out?" "Should we remove the banister rail?" and of course the dreaded, "I could cut a bit off and try and put it back together?"

Eventually, a friend commented, removing one or two of the threads in our staircase might give the extra half a foot needed to maneuver it up. Luckily, when removing the carpet and underlay we found we had just enough room to force it up with minimal damage to wall and dresser. I would be painting the wall in time anyway but I would have to repair any damage to the dresser.

That was 4 years ago. I still haven't fixed it.
But now, I think it's time.

I've found 6 great ideas to transform different types of dresser.

Below are the Before & After photos followed by a link to the website on how to achieve the look.

1. Distressed Dresser

                        Before                                                                                               After
Image: Miss Mustard Seed


Jump over to Miss Mustard Seed for the details.


2. Ikea-hack Dresser.

Image: Gravy Train

Image: Gravy Train
 Jump over to Gravy Train for the details.


3. Adding Fabric to a Dresser.
                                                                             Before
Image: 508 Restoration & Design
                                                                            
                                                                              After
Image: 508 Restoration & Design
Jump over to 508 Restoration & Design for the details.


4. Stencilled Dresser

                            Before                                                                                        After
Image: 508 Restoration & Design


This is also from 508 Restoration & Design


5. Chalkboard Dresser
Image: homelife
Jump over to Home Life for this and lots of other ideas using chalkboard paint.


6. Nursery Dresser
                                                                           Before
Image: Domestic Adventure
                                                                          
                                                                            After
Image: Domestic Adventure
Head over to Domestic Adventure for the details.

There are plenty of ideas to choose from but if none of them suit you can always try the traditional route and tackle a full on restoration. There's some great tips on TLC home about how to restore wood furniture.

Sep 21, 2011

Origami Lights Project

Image: freshlypicked
Traditionally in Ireland you can never count on the Summer to be:
1. Warm
2. Sunny
3. Warm and sunny at the same time

This is why September and October are my favourite months in the year. With the low sun casting a warm glow and with everything turning orange, red and golden yellow it gives the veiled impression that there is a warm feeling in the air.
That warm feeling could also have something to do with the fact that you are now wearing extra clothes like jumpers, scarves, hats and gloves but still, those late evenings are slightly magical as the day begins to wind down and the sunsets become more spectacular.

It also seems that more and more people are having BBQ's later into the year. I think people are getting fed up with uncovering their hibernating BBQ's mid June in the hope of a great cooking summer. Only to cover them up again late June in an attempt to ward off any rusting from the July and August rains. It seems we've had enough and said "To hell with it".

So what better way to add some atmosphere to a BBQ on a late Autumn evening than homemade origami lights.

First of all this is a great use for your Christmas lights which only get the chance to shine once a year. Out they come, tangled up beyond all hope, strung around a tree for 2 weeks before being packed away for another 11 1/2 months and thrown back up into the attic.

For the paper, why not use up any scraps of waste paper like old faxes, misprints, magazine pages - anything that would normally get thrown out or recycled.

Now for the origami part.

                                Start with a square piece of paper,  8 1/2 in x 8 1/2 in for these lights.
Image: freshlypicked
                                                                       Fold diagonal.
Image: freshlypicked

                                                        Again on the opposite diagonal.
Image: freshlypicked

                                                                        Fold in half.
Image: freshlypicked

                                            And again, in half. You should have folded 4 times.
Image: freshlypicked

              Pinch the flat edges together to form this point. If you can't form it, try flipping the paper over. 
Image: freshlypicked

                                                  Your piece should now look like this.
Image: freshlypicked

                                               Then fold all of the corners up to the middle.
Image: freshlypicked

                                                                            Like so.
Image: freshlypicked

                                             Then fold the edges into the middle, all four sides.
Image: freshlypicked

Image: freshlypicked

Image: freshlypicked

                                     Then take the four loose ends + tuck them into the pockets.
Image: freshlypicked

Image: freshlypicked

                                                       One end should have a little hole.
Image: freshlypicked

                                                Blow air into that hole, inflating your lantern.
Image: freshlypicked

                                        Using the hole, attach the lanterns to the string of lights.
Image: freshlypicked


There's a bit of work involved in it but the results are great. 

Being able to sit out in the late evening, watching the sun set surrounded by twinkly outdoor lights.

And perhaps a scarf or two.

Nursery Wall Art - Shop

I've added a few new items to my online shop. Click here to find more details.


NURSERY WALL ART


Nursery wall art as an eye catching accessory to any children's bedroom or playroom.

Each piece measures 45 cm x 38 cm


Each piece is hand painted. Sign can be custom made to include your own sayings or quotes.

Each canvas and frame is created from reclaimed wood and receives a light sanding to acheive a truely unique vintage look.


3 different pieces to choose from

1. You Are Feeling Sleepy
2. Twinkle Twinkle
3. You Are My Sunshine


Click here  to jump over to the shop for more details about prices.

Sep 4, 2011

Shop Now Open


Jump on over to my shop to check out hand carved pieces by me.